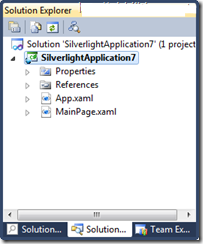
While creating a Silverlight application in Visual Studio, IDE asked for whether you want to host the Silverlight application in a new ASP.NET web site or not after providing the application name. If you select the “Ok” button , Visual Studio will create a ASP.NET Site to host the corresponding Silverlight Application. So, whenever you will run the Silverlight application, ASP.NET site will automatically host the Silverlight file. Then how it works if you want to have an existing Silverlight Application that hosts in a ASP.NET site in a similar way that New Silverlight project does? Or you want to add a new Silverlight application which will automatically host inside your current asp.net web site? Do you know we can easily achieve this using “Property Pages” of an ASP.NET Application. Let’s explore how to create Silverlight Application using ASP.NET Property Pages.
 Let’s consider you have an existing Silverlight application and you want to host it in a ASP.NET Web sites.
 Step 1 – How to Create Silverlight Application using ASP.NET Property Pages
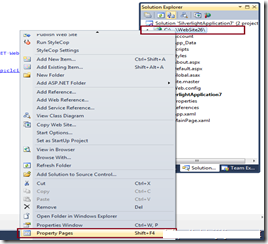
In first place, you have to add a new ASP.NET application in the same solution. Then Right click on ASP.NET Application and select “Property Page” (Shift +F4) from Context menu.
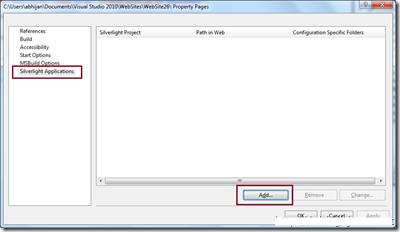
 Once you select the Property Pages, below screen will appear:
 Step 2- How to Create Silverlight Application using ASP.NET Property Pages
Select “Silverlight Applications” from left side list and Click on “Add” button. On the click of “Add” button, below screen “Add Silverlight Application” will appear:
 Step 3 – How to Create Silverlight Application using ASP.NET Property Pages

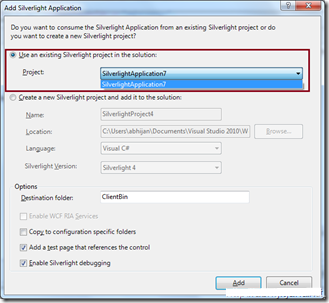
There you will have two option
1. Use an existing Silverlight Project in Solution
2. Create a new Silverlight Project and add it to solution
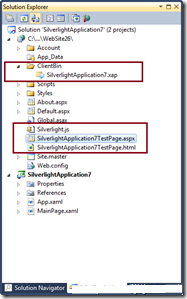
As we are going host an existing Silverlight application, we will go with the first option. From the project dropdown ( If you have more than one you can select any of them ) select the Silverlight Project and Click on “Add”. You are done. This process will do all the required steps for you to host the Silverlight Application. If you go back to your solution explorer, you will find ClientBin Folder and few new files are added with ASP.NET site along with ASP.NET and HTML Test pages.
 Step 4 – How to Create Silverlight Application using ASP.NET Property Pages
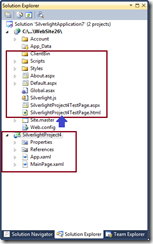
Now, if you run your Silverlight application, it will be host inside newly created ASP.NET Site. In the second scenario, You have an ASP.NET Site and you want to add a new Silverlight Project which will automatically host the newly created application. The process are quite similar, in this case from property pages, instead of Existing Silverlight project option, you have to select “Create a new Silverlight Project and add it to solution”.
 This will add a new Silverlight Application with your web site.
 Looking for ASP.NET Hosting on European Server? We can help you a lot!
hostforlifeasp.net is European Windows Hosting Provider which focuses on Windows Platform only. We deliver on-demand hosting solutions including Shared hosting, Reseller Hosting, Cloud Hosting, Dedicated Servers, and IT as a Service for companies of all sizes. We have customers from around the globe, spread across every continent. We serve the hosting needs of the business and professional, government and nonprofit, entertainment and personal use market segments.
 hostforlifeasp.net is awarded Top No#1 SPOTLIGHT Recommended Hosting Partner by Microsoft. Our service is ranked the highest top spot in several European countries, such as: Germany, Italy, Netherlands, France, Belgium, United Kingdom, Sweden, Finland, Switzerland and other European countries. Besides this award, we have also won several awards from reputable organizations in the hosting industry and the detail can be found on our official website.